(As a note, I use kouji instead of "koji" because my very good friend's named is Koji and it feels awkward to call a fungi by my friend's name).
Ingredients:
-1 kg of rice. (I use 2 parts white rice to 1 part brown rice). Can be all white rice. In case of using brown rice, the surface needs to be scarred in a blender (separately from the white rice) so the kouji can penetrate the rice. (On the pics I show a 3 kg batch being made).
-Half a bag of Gem Culture Kouji Starter.
-Rice flour 1 table spoons, dry heated in a pan to sanitize.
Equipment:
-Nylon Mesh Bag such as this. It should be food grade and machine washable.
-Square piece of cotton cloth. Mine is a pillow (100% cotton) cut and opened up into a rectangle.
-Some sort of heating to keep fermentation vessel at 85F for the first 18 hours. I use a single coil burner such as this set at warm or low heat attached to a thermostat. The thermostat I use with the heater is a Hydro Farm Thermostat. Caution: Please note that the use of the single coil burner and thermostat in this way is not a normal use so use at your own risk.
Day 1) Morning:
-Weigh 1 kg of rice. I use 2 parts white rice (~700 gr) to 1 part (300 gr) brown rice. The brown rice needs to be scarred so the kouji can enter the rice. I use a blender to scar the outer skin of the brown rice.

-The rice is rinsed 3 times until the water runs a light white color to clean the rice and reduce the stickiness.

Day 1) Afternoon (After 6 hours)
-After the 6 hour soak, drain the rice for 30 minutes.

-While it is draining, start heating a big pot with about 1.5 inch (~3 cm) of water. Depending on the pot used, you may need to start with more water so the pot does not go dry. Place a bowl and some sort of perforated platform to place the mesh bag with rice.

-I place the rice in a food grade mesh bag.


-I break up the rice and turn it so it evenly heats. Warning! Steam is extremely hot. Use long tongs to reposition bag or leave bag alone if risky.
-Once steam rises from the rice, start the 50 minute official steaming. For the time being, 1 tablespoon of rice flour is heated in a pan to sanitize it. Place in a small bowl to cool. (I usually heat sanitize 2 tablespoons. Once cool, I mix with one full bag of the Gem Culture Kouji Starter. Then I use half for the day and save the other half in the fridge for next time)

-Once cool, sprinkle in the kouji starter and mix.

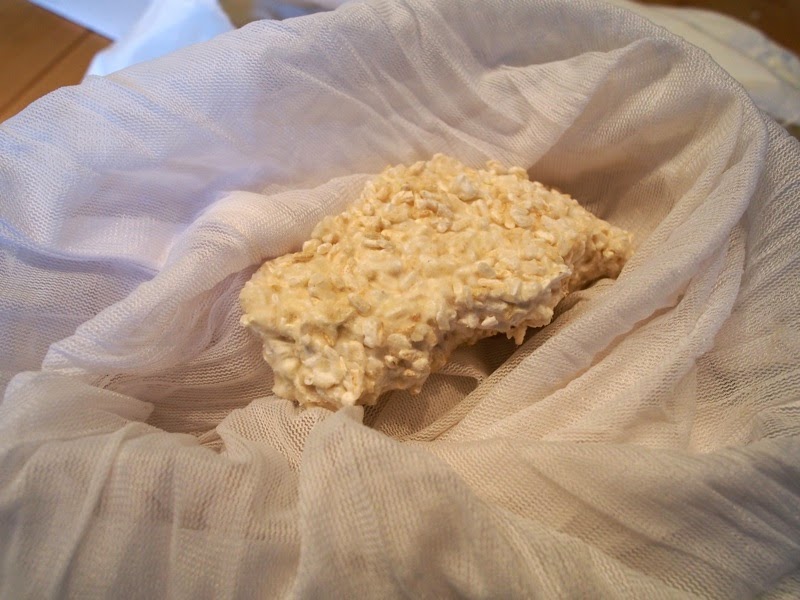
-After 50 minutes, the mesh bag with the rice is taken out and spread out to cool. I use a pillow cut open and place the mesh bag on top.

-After the rice cools to about 113F (45C), the kouji starter is sprinkled on top.

-Mix very thoroughly, and form a ball. Cover with the cloth (aka the pillow) and tie.

-Place the cloth ball in the pot and place in the oven to incubate. Not shown here, I will place a piece of newspaper on top and loosely place a lid on top to cover.

-I use a Hydrofarm thermostat along with a single coil heater set at 85F (30C).

Day 2) Afternoon (After about 18-24 hours)
-The middle of the ball will be warm and small white spots will be visible.


-The rice is spread out as thin as possible (~1.5" in thickness ~4 cm) to dissipate the heat which will be created during the fermentation. Then, I cover it over with the cloth.

-Then I place it back in the oven at 85F (30C). It will start to generate its own heat so depending on the season, I will either lower the temp or cut it completely during the summer months.

Day 3) Afternoon (After 48 hours)
-During the fermentation, the kouji will smell earthy-sweet and is a wonderful aroma! The kouji will have formed a thick mass of white fluffy goodness when done.

-The rice will be a block of kouji.


-At this time, you can crumble it and spread it out to dry for a few hours. I prefer to put it in a container or ziplock bag and refrigerate it.


-Usually I will refrigerate for up to a week and if I need to store it further, will put it in the freezer. I have kept the kome-kouji for months in the freezer and the kouji is still active.
-At this point, you can use the kome-kouji to make amazake, shio-kouji, shoyu-kouji and miso.
Hope this helps you on your kouji making journey. Happy kouji making!
by Natto Dad.
If that was not enough... keep reading.
-One big difference between natto and kouji is that kouji likes well aerated, not too wet environments. I used my trusty glass baking pan that I use for natto and the kouji would come out mushy. I read into this and in a very moist/wet environment, the kouji will not go into the sporulating pathway. The nutrients are abundant and they can be absorbed readily. The end result is that it will make a mushy rice-kouji.
-In the pics, you will see that I used the Light Rice Kouji Starter from Gem Culture. This is because I prefer this to make amazake, shio-kouji and shoyu-kouji which I will be making soon.
-When I make miso, I either use Light Rice Kouji or Red Kouji starter.
-Light Rice Kouji will make a sweet miso that is very good as a dip with fresh cucumber sticks (Miso Kyuu). It is also good for miso dressings.
-I will use Red Kouji starter to make Aka Miso. This type of miso is saltier and deeper in flavor which I prefer for my miso soup. Miso soup with Light Rice Kouji is also good, but I find it a little too sweet for my taste.
-In the case that maintaining the optimal temp of 85F (30C) for 48 hours is logistically impossible, the initial 18 hours are the most crucial. If the temperature can be kept for the initial 18 hours, the kouji will be active enough and generate enough heat to coast through the rest.
-Kome-kouji is very versatile and although it requires another step to make shio-kouji and the others, I always find it rewarding. Will make some time to write the recipes for shio-kouji, shoyu-kouji, amazake and miso in the near future.
Thank you once again.